Quick Start
To create your own level you need to select Quick start from Tools/Red Bjorn/Editors submenu.

You will see the Quick Start window where fields are already filled.

1. Folder is the root folder of level related to the Assets folder
2. Scene Filename is the name of scene file without .unity extension
3. Map Grid could be Square or Hex.
4. Map Axis defines which plane will be used for map creation (XZ, XY, ZY)
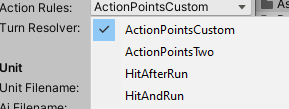
5. Action Rules define the way unit could make its actions
6. Turn Resolver defines the way turn completion is handled
7. Battle Finish – finish battle conditions
8. Unit Filename is the name of the asset file which will be created for storing information about unit (at least one unit should be created to start the level)
9. Ai Filename is the name of the asset file which will store information about unit artificial intelligence
10. Ai Logic is the type of Ai behavior. Right now, there are 2 types: SimpleLogic and Universal

ActionPoinstCustom allows to spend X Points (2 by default), where 1 move action cost 1 Point and 1 item action cost also 1 Point. Move action after Item action is prohibited.
ActionPoinstTwo = ActionPoinstCustom where X = 2 constanlty (most Common)
HitAfterRun allows
- 1 move action or
- 1 item action or
- 1 item action after 1 move action
HitAndRun allows 1 move action and 1 item action in any order

MoveRange: after the unit will do its’ actions the turn will be moved to the next unit (it can be in other squad) in list ordered by move range value.
Squad: all units in squad could do its’ actions and then turn will be moved to other squad
After specifying the desired values and clicking Create button you will see next three steps

Let us start from map creation like it is conceived and click Edit button

You will see Map Editor window (more information about Map Editor is inside ProtoTiles documentation)

Click Plus button to add initial tile preset and specify prefab field with the cube of 1 unit height and width, for example, EarthSquare

Then click the Pencil button to draw the map at the Scene view tab.

Let us draw 5x5 tile map (or any map you can imagine)

Close Map Editor window and return to the Quick Start window and move to the next step - UnitSpawn

Here you will see already filled fields for Unit spawn point creation. But do not hurry, first Click Edit button to configure our blank Unit asset. It will be the template for other units.

New window (Unit Editor) will open. Define Visual parameters

Then define Stats parameters

And add at least one default item. You could also create new item here, clicking Edit button will open Item editor, but for now, let us choose from already created items, for example, Grenade and return to Quick Start window.

Click Create button to add Unit Spawn point to the Scene View tab

Spawnpoint (1) will be created at Vector3.zero position and you can move it to any map position and click Center button to align with the tile center

Return to Quick Start window and change unit team to Team 2

Let us create another unit to prevent the enemy unit from looking like initial unit. Click Edit button than Duplicate button at Unit Editor

After specifying the desired filename click the Duplicate button.

After asset creation, a new unit will be selected at the Unit Editor window. Let us change its model.

And change its default item

Return to Quick Start window and define new unit inside Unit field and click Create button

Move the new unit to the correct position. Do not forget about Center button to align spawnpoint position

In Quick Start window move to the next step – Level

Click Edit button to open Level Editor window

At the Camera tab specify Start Position. For our map (0, 10, -6) will be appropriate position.

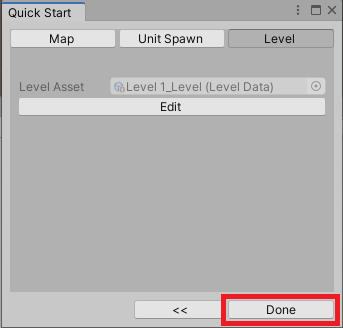
Return to Quick Start window and click Done button

Ta-dam! Congratulations you have created your own level. To check it, click the Playmode button. You will be redirected to Menu scene.


Created with the Personal Edition of HelpNDoc: Elevate Your CHM Help Files with HelpNDoc's Advanced Customization Options
